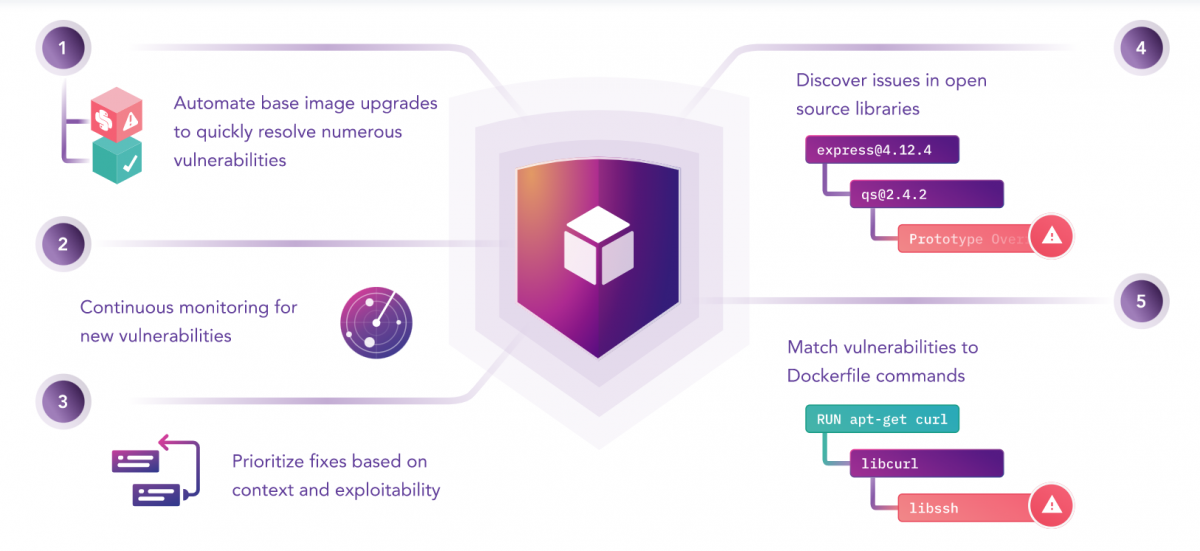
Snyk offers a cloud platform first, but it offers various products. Snyk OpenSource integrates through the editor’s CLI into a Git flow. Once launched, the software detects vulnerabilities, classifies them by degree of sensitivity, and automatically corrects known security errors. This functionality can be incorporated into the pull request cycle in order to apply to code sent to repositories. Snyk Infrastructure as Code, on the other hand, analyzes the vulnerabilities and fixes them in the JSON and YAML Kubernetes configuration files. Here, a rules engine allows you to configure the sensitivity of detections within Git repositories according to the parameters decided by the administrators. Snyk Container allows you to test docker images and associated registries at the time of their creation and after. The program can be integrated into CLIs, SCMs, CI tools, container registries, and Kubernetes.
Today, we will see how we can use Snyk Container, which comes built-in with Docker to detect vulnerabilities.
Sample docker file
The first thing that you need for using Snyk to detect vulnerabilities is a docker image. In this example, we will be using the following docker image : The first thing we must do is generate the image locally through the following command: Now we have an image to analyze.
Scan the image from the Docker client
The integration of the Snyk service with Docker makes this process incredibly simple. To start the scan, you just have to execute the following: This will start with the analysis where it will return a more or less extensive output, depending on the vulnerabilities it finds, and with a final summary: As you can see, it not only tells you how many vulnerabilities it has found. Even if you scroll up, you can see what they are and their criticality, but it also makes recommendations regarding the base image you should use. You can also check the details of the vulnerability from the Snyk Vulnerability Database. In my case, it offers me several alternatives, so I am going to modify my Dockerfile with the first option: If I rebuild the image and scan it: You will see that the output now shows fewer vulnerabilities, and in this case, it tells you that you are currently using the more secure base image: You can also get a more detailed report if you add the docker file that generates the image to the command: And even exclude the base image from the analysis, just in case you want to focus on what you have done wrong: This service can also be integrated with the Docker Hub repositories:
But for this, you must have one of the paid subscriptions. However, you can launch it locally, with the free plan that you have just for being logged in to Docker Hub (it has clear scanning limits), while you develop or want to check how secure is a third-party image that you want to use.
Using Snyk with Github Actions
The first thing to do is create a repository and inside create a folder. Next, to use Snyk Container in Github is to create a new image or take that image we created in Docker Hub. To use Snyk, you have to create a new secret called SNYK_TOKEN, and to obtain the token, you have to create an account at Snyk. From General Settings, where it says API Token, you can quickly generate it. With the token, you can create the secret on Github and use it in the Action. Now, you have to pass it the name of the repository that was created in Docker Hub. Next, you have to pass the message it has to send. You can access the outputs of the steps to use as a variable in the message. How to run the entire workflow? Simple just by pushing Master. Github Action will detect the file inside .github / workflows /.
Final Words 👈
With the increasing popularity of containers, the incidents of security breaches are becoming more and more common, most of which are due to the misconfiguration errors in the deployment of the containers. Snyk provides an efficient and straightforward tool that can help us avoid misconfiguration errors and detect the most common vulnerabilities in docker images.


